Desserts
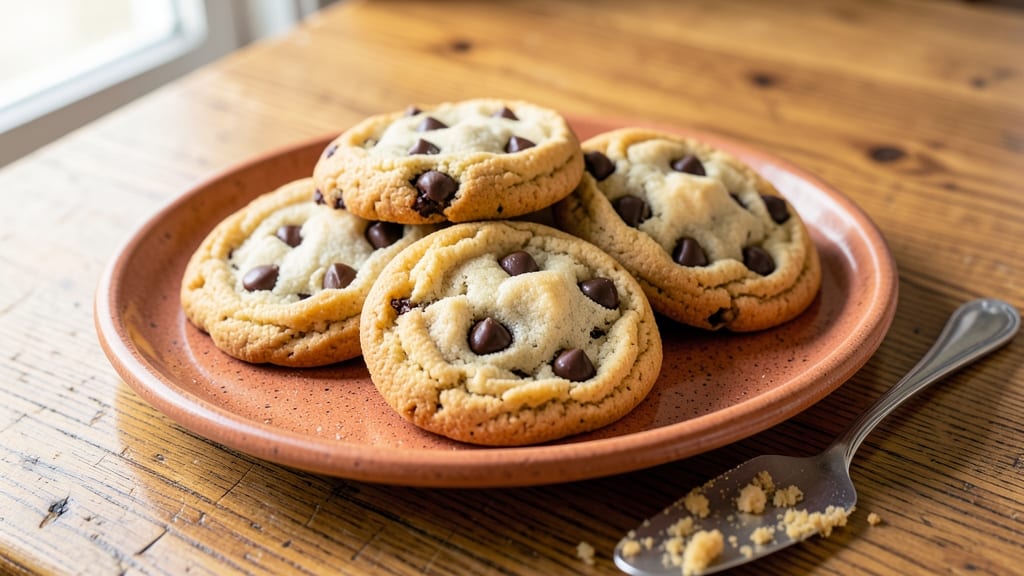
This copycat Mrs Fields chocolate chip cookie recipe delivers the signature buttery swirls and toasted nut crown that made the brand legendary. After analyzing original recipes and baking dozens of batches, I've perfected the texture—crisp edges, chewy centers, and pools of melted chocolate that never turn to mush.
The secret lies in precise ingredient ratios and a baking technique that ensures even browning without overcooking.
What sets these apart is the combination of brown and white sugar for caramel depth, plus a touch of corn syrup to prevent spreading.
I use a mix of semi-sweet and milk chocolate chips for that classic flavor balance, and the addition of chopped walnuts in the dough creates those signature nut crowns that become irresistibly crispy during baking. The dough is chilled for 24 hours, which develops deeper flavor and prevents over-browning.
By following this method, you'll achieve cookies with perfectly golden edges, tender interiors, and chocolate that stays melty even after cooling. The aroma alone will transform your kitchen into a bakery, and the first bite delivers that nostalgic Mrs Fields experience—just like the original, but now with your personal touch.
These are the kind of cookies that disappear faster than you can say "warm from the oven."
The recipe scales perfectly for parties or gifting, and the dough can be prepped ahead for ultimate convenience. Whether you're recreating childhood memories or impressing guests, this copycat version delivers the iconic taste and texture that made Mrs Fields famous.
Let's get baking—your kitchen is about to smell like a cookie wonderland.
Ingredients for copycat mrs fields chocolate chip cookie
Buttery swirls, melty chocolate pools, and toasted walnut crowns—just 13 ingredients for iconic cookies.
| Ingredient | Amount | Notes |
|---|---|---|
| Unsalted Butter 🧈 | 1 cup | Cold, cubed for swirls (use full-fat) |
| Granulated White Sugar 🍚 | ¾ cup | Superfine for even mixing |
| Packed Brown Sugar 🍚 | ¾ cup | Light brown preferred (not dark) |
| Corn Syrup 🍯 | ¼ cup | Karo brand recommended |
| Large Eggs 🥚 | 2 whole | Room temperature for blending |
| Pure Vanilla Extract 🌿 | 2 tsp | Imitation-free preferred |
| All-Purpose Flour 🌾 | 2 ½ cups | Sifted, no substitutions |
| Baking Soda 🧂 | 1 tsp | Freshly opened |
| Salt 🧂 | 1 tsp | Diamond Crystal preferred |
| Semi-Sweet Chocolate Chips 🍫 | 2 cups | Enjoy Life brand for allergies |
| Milk Chocolate Chips 🍫 | ½ cup | Hershey's Special Dark for contrast |
| Chopped Walnuts 🌰 | 1 cup | Toasted for nutty depth |
| Granulated Sugar 🍚 | ¼ cup | For nut crown topping |
The butter is non-negotiable—full-fat, unsalted for that signature richness. Grab it cold from the fridge and cube it yourself (don't melt it). Land O'Lakes or Plugrá are my go-tos, but any good brand works. The corn syrup might be hiding in the baking aisle—Karo is the gold standard, but generic brands are fine. For the sugars, superfine white sugar dissolves better, but regular granulated works if you pulse it in a food processor. The walnuts? Toast them first—3 minutes in a dry pan until fragrant. That's where the magic happens.
No corn syrup? Light corn syrup or honey at half the amount works in a pinch, but the texture might spread more. Chocolate chips can't be swapped—white chocolate changes the whole vibe. Dried fruit? Chopped dates or raisins at half the walnut amount, but expect a different texture. The baking soda must be fresh—older than 6 months and it loses lift. For the nut crown, mix the sugar with 1 tbsp flour to prevent clumping. And yes, you can use pecans instead of walnuts if you prefer—just toast them too.
The dough needs 24 hours in the fridge—this is non-negotiable for flavor development. Portion it into 1.5 oz balls (about 2 tbsp each) for perfect size. Store any extras in an airtight container for up to 5 days. For the nut crown, sprinkle it on right before baking—it burns fast. Baked cookies keep 5 days at room temp or 3 months frozen. I wrap them individually in parchment so they stay soft.
Why You'll Love This Recipe
- No-Fuss Mixing: I swear by the creamy magic of softened butter, brown sugar, and corn syrup—just mix with a spoon, no food processor needed. The dough comes together faster than I can say "chocolate chips," and honestly? That’s the kind of recipe I want after work.
- Chewy-Centered Bliss: The corn syrup keeps these cookies soft and gooey inside, while the butter and sugars create that perfect crisp edge. (Yes, even on a Tuesday night.) It’s the kind of texture that makes you close your eyes and sigh—no overbaking, no dry disappointment.
- Party in a Jar: These freeze like a dream, so I always bake a double batch. Toss them in an airtight container, and you’ve got last-minute treats for holidays, potlucks, or when your kid’s soccer team needs snacks. No one will guess they’re homemade.
- Budget-Friendly Luxury: Butter, sugar, and eggs? That’s it for the base—no specialty ingredients, no markup. I make a dozen for under $3, and they disappear faster than my willpower on a bad day. (Between us, the leftovers are my secret weapon.)
Step-by-step instructions for copycat Mrs Fields chocolate chip cookies
Here's how to recreate those iconic buttery swirls and nut crowns at home.
Cream the Butter and Sugars Together
In a stand mixer fitted with the paddle attachment, combine the 1 cup unsalted butter (cold, cubed) with the 0.75 cup granulated white sugar and 0.75 cup packed brown sugar. Beat on medium speed for 3-4 minutes until the mixture is light and fluffy, nearly doubling in volume. You'll notice the color lighten as air gets incorporated—this creates those signature crackly tops.
I like to press down on the butter mixture with a spatula during the last 30 seconds to ensure it's fully creamed. This step is critical—under-creaming leads to dense cookies, while over-creaming develops gluten and makes them tough. Stop when the mixture looks like pale, fluffy whipped cream.
Add Eggs, Vanilla, and Dry Ingredients
Add the 2 whole large eggs (room temperature) one at a time, mixing on low speed for 30 seconds after each addition. This gradual addition prevents curdling. Then stir in the 2 teaspoons pure vanilla extract and mix for another 10 seconds until fully combined.
In a separate bowl, whisk together the 2.5 cups all-purpose flour, 1 teaspoon baking soda, and 1 teaspoon salt. With the mixer on low speed, gradually add the dry ingredients to the wet mixture. Mix just until combined—you should still see small flour streaks. Overmixing develops gluten, which makes cookies tough. Scrape down the sides of the bowl as needed to ensure even mixing.
Fold in Chocolate Chips and Walnuts
Remove the bowl from the mixer and gently fold in the 2 cups semi-sweet chocolate chips and 0.5 cup milk chocolate chips using a silicone spatula. Then fold in the 1 cup chopped walnuts. Be careful not to overmix—just combine until the chocolate and nuts are evenly distributed. The dough will be thick and sticky, but that's perfect for the signature texture.
Divide the dough into 4 equal portions (about 1 cup each) and flatten each into a 6-inch round disc. Wrap each disc tightly in plastic wrap and refrigerate for at least 1 hour or up to 24 hours. Chilling is non-negotiable—it prevents excessive spreading and allows the flavors to meld for maximum depth.
Create the Signature Swirls and Nut Crowns
Preheat your oven to 375°F and line two baking sheets with parchment paper. For each disc of dough, roll it out on a lightly floured surface to a 12-inch circle. Spread 1 tablespoon of the dough evenly over the surface, leaving a 1-inch border. Sprinkle 1 tablespoon of the granulated sugar (for the nut crown) evenly over the spread layer.
Using a spatula, gently gather the edges of the dough and fold them toward the center to create a swirl pattern. Press down lightly to seal, then transfer to the prepared baking sheet. Repeat with the remaining dough. Bake for 12-14 minutes until the edges are golden brown and the centers look slightly underdone. The tops should have a crackly, crisp texture.
Finish with the Nut Crown and Serve Warm
Immediately after removing the cookies from the oven, sprinkle 1 tablespoon of the chopped walnuts over each cookie to create the classic nut crown. Let the cookies cool on the baking sheet for 2 minutes, then transfer to a wire rack to cool completely. The contrast of warm, gooey centers with crisp edges and the nutty crown is what makes these cookies legendary.
Serve warm for the ultimate experience—each bite delivers that perfect balance of buttery richness, sweet chocolate, and toasty walnuts. Store in an airtight container for up to 5 days, but they rarely last that long in my house!
Pro Tips For Making Copycat Mrs Fields Chocolate Chip Cookie
- Measure Butter Cold: Take the butter straight from the fridge—no softening needed. I learned this the hard way after making dough that spread like pancakes on a griddle. The corn syrup in this recipe already adds moisture, so cold butter keeps the texture thick and chewy.
- Mix Dry Ingredients First: Whisk the flour, baking soda, and salt together before adding wet ingredients. This prevents lumps, especially with the corn syrup, which loves to cling. Trust me, your cookies will thank you—no weird flour pockets in the middle.
- Underbake Slightly: Pull cookies out when edges are just golden but centers still look soft. They’ll firm up as they cool, but overbaking turns them dry. Use a timer—Mrs. Fields’ version is chewy, not crisp.
- Chill Dough Twice: First, chill the dough for 24 hours (yes, overnight). Then, scoop balls and freeze them on a tray before baking. This prevents spreading and gives you perfect, uniform cookies—no last-minute reshaping needed. (I know, it’s a pain, but it works.)
Storing and reheating your copycat mrs fields chocolate chip cookie
Refrigerator Storage
The dough is best stored in the fridge for 24 hours before baking—this is non-negotiable for flavor development. Portion the dough into 1.5 oz balls (about 2 tbsp each) and place them in an airtight container with parchment paper between layers.
They’ll keep for 5 days this way, but I recommend baking within 48 hours for peak texture. The cold temperature prevents spreading and maintains that signature chewy center. 🧊
Freezer Storage
For long-term storage, freeze the dough balls in a single layer on a parchment-lined tray for 1 hour to prevent sticking, then transfer to a freezer-safe bag or airtight container. They’ll last for 3 months this way.
When ready to bake, thaw the dough in the fridge overnight or at room temperature for 1-2 hours. Never microwave—it alters the texture. For baked cookies, wrap individually in parchment paper and freeze for up to 3 months to maintain softness.
Reheating Baked Cookies
Warm cookies straight from the oven are the best, but if you need to revive stale ones, place them on a baking sheet and heat in a 350°F oven for 3-5 minutes.
For a quicker fix, microwave for 10-15 seconds covered with a damp paper towel. The key is moisture—this restores the chewy texture. Avoid reheating in the microwave uncovered, or they’ll dry out. 🔥
Reviving Stale Cookies
If your cookies have lost their chew, try the "steam trick": Place them in a single layer on a baking sheet, cover with a damp towel, and microwave for 10 seconds. The steam softens them back to nearly fresh.
For a longer-term fix, store cookies in an airtight container with a slice of bread or apple—their natural moisture will help preserve freshness. This works best for cookies stored at room temperature for 3-4 days.
Baking from Frozen
Skip thawing! Place frozen dough balls directly on a parchment-lined baking sheet and bake at 375°F for 14-16 minutes. The extra time accounts for the cold dough. For frozen baked cookies, reheat in a 300°F oven for 5 minutes to avoid burning the nut crown.
The texture might be slightly denser, but the flavor stays intact. This is my go-to for last-minute baking when I forget to thaw the dough. ⏰
Portioning for Perfect Size
Use a 2-tablespoon cookie scoop or scale each dough ball to 1.5 oz for consistent baking. Uneven portions lead to cookies that spread too much or bake unevenly. If you’re baking for a crowd, double the dough and freeze half for later—just remember to thaw before baking.
The nut crown will crisp perfectly when baked from frozen, but the centers stay soft if you add 1 extra minute to the bake time. 🍪
Nutrition facts
Frequently asked questions
Why does the dough need to chill for 24 hours?
Chilling the dough for 24 hours develops deeper flavor and prevents excessive spreading during baking. The cold temperature also allows the gluten to relax, which results in a tender, chewy center. This step is essential for replicating that signature Mrs Fields texture—skip it, and you'll get flatter, denser cookies.
Can I use regular granulated sugar instead of superfine?
Yes, but pulse it in a food processor for 10-15 seconds to break it down. Superfine sugar dissolves faster, creating a smoother dough and better texture. If you skip this step, your cookies might spread more and have a slightly grainier texture. The flavor difference is minimal, but the texture will be noticeably different.
How do I fix cookies that spread too much?
If your cookies spread excessively, your oven is likely too hot or the dough wasn't chilled long enough. Next time, try baking at 350°F instead of 375°F and chill the dough for the full 24 hours. Also, make sure your butter is cold when creaming it—this helps prevent spreading. For already-baked cookies, the nut crown will still taste great, but the texture might be flatter.
What's the best way to store baked cookies?
Store cookies in an airtight container at room temperature for up to 5 days to maintain freshness. For longer storage, freeze them individually wrapped in parchment paper for up to 3 months. The key is preventing moisture loss—this keeps them soft and chewy. If they start to dry out, try the steam trick (microwave with a damp towel for 10 seconds) to revive them.
Can I make these cookies without walnuts?
Swap the walnuts for pecans or almonds (toasted for 3 minutes in a dry pan) or even chopped dates for a different flavor profile. Just remember to toast the nuts—they add that signature crunch and flavor. If you omit them entirely, the cookies will still be delicious, but they'll lose that classic nut crown texture.