Desserts
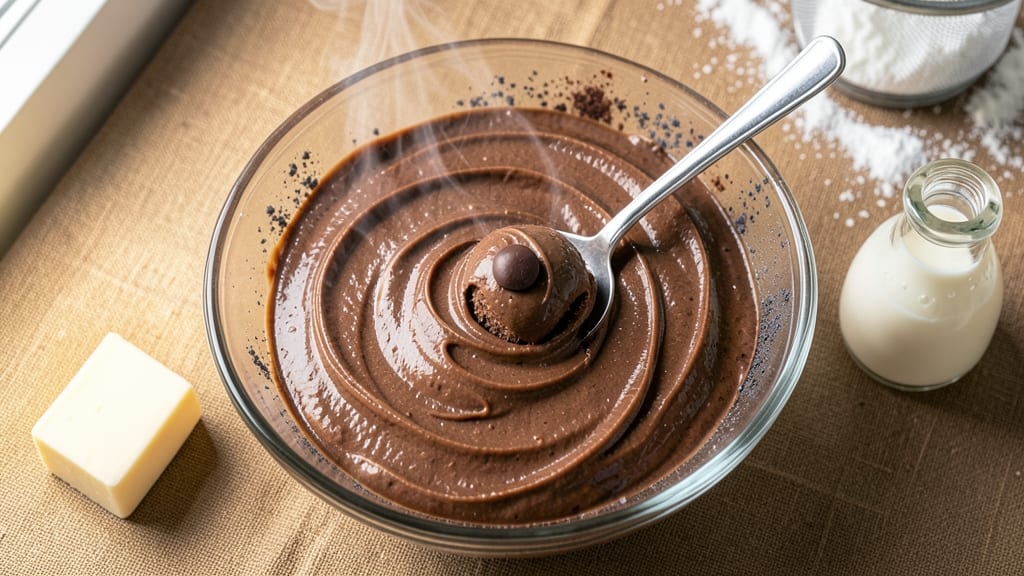
Creating Betty Crocker-style rich and creamy chocolate frosting that stays velvety smooth and never separates is simpler than you think. This recipe delivers that signature restaurant-quality texture—thick enough to pipe but light enough to spread—using precise ratios of butter, chocolate, and powdered sugar.
The secret lies in melting the butter and chocolate together before gradually incorporating the dry ingredients, which prevents graininess and ensures a silky finish every time.
What sets this frosting apart is its foolproof method that eliminates common pitfalls like lumps or butter seizing. You’ll work with just 6 ingredients, all of which are likely already in your pantry, and the process takes under 15 minutes—perfect for last-minute decorating or filling cakes.
The result? A frosting so creamy it melts in your mouth, with a deep chocolate flavor that’s rich but not overpowering, thanks to the careful balance of cocoa powder and vanilla.
This frosting is ideal for layering between cake layers, piping onto cupcakes, or spreading over brownies for that classic bakery-style finish. The recipe includes a simple test to check for perfect consistency—no guesswork involved.
Whether you’re baking for a celebration or satisfying a chocolate craving, this frosting will elevate your desserts to professional-level quality without the fuss.
For dietary adjustments, I’ll share how to adapt this recipe for dairy-free or lower-sugar versions while keeping that signature creamy texture intact. Let’s get started on creating frosting that’s as reliable as it is delicious.
Ingredients for betty crocker rich and creamy chocolate frosting
Six pantry staples transform into velvety frosting that pipes like a dream.
| Ingredient | Amount | Notes |
|---|---|---|
| Unsalted Butter 🧈 | 1 cup | Cold, cubed for even melting |
| Semi-Sweet Chocolate Chips 🍫 | 1 ½ cups | High-quality, 60% cocoa preferred |
| Powdered Sugar 🍚 | 3 cups | Sifted for smooth texture |
| Cocoa Powder 🍫 | ½ cup | Dutch-processed for richness |
| Pure Vanilla Extract 🍯 | 1 tbsp | High-quality, imitated-free |
| Heavy Cream 🥛 | ¼ cup | Cold, for stability |
The butter and chocolate chips are the backbone of this frosting. Use European-style butter like Plugrá or Land O’Lakes Pure Creamery—it has higher fat content, which keeps the frosting ultra-creamy. For chocolate, Ghirardelli or Guittard chips melt more smoothly than store brands. The cocoa powder? Hershey’s Special Dark or Dutch-processed makes a world of difference—avoid the baking cocoa with baking soda unless you want a tangy twist. Keep the butter cold when measuring; it should just start to soften when you handle it. The heavy cream adds stability, so don’t skip it—even if you’re tempted to use milk for a lighter version.
No butter on hand? Coconut oil in equal amounts works for a dairy-free version, but the texture will be slightly firmer. Out of semi-sweet chips? Chop a 6-ounce bar of chocolate into small pieces for the same effect. The powdered sugar can be swapped for confectioners’ sugar plus 1 tbsp cornstarch if you’re out, but sift it well to avoid lumps. For a lower-sugar option, reduce the powdered sugar to 2.5 cups and add 0.25 cup maple syrup or honey—just be aware it’ll be slightly stickier. The vanilla extract is non-negotiable; imitation won’t give you that deep, complex flavor. If you’re in a pinch, vanilla bean paste works beautifully too.
This frosting keeps for up to 5 days in the fridge, sealed tightly in an airtight container. For longer storage, freeze portions in 1-tablespoon dollops on parchment paper—thaw at room temperature before using. Reheat gently in the microwave for 10-second bursts if it thickens too much. To test consistency, dip a spoon in and lift it—if it holds a peak but slowly melts, you’ve nailed it. For piping, chill the frosting for 30 minutes first. It’s worth the wait for those perfect swirls.
Why You'll Love This Recipe
- Three-Ingredient Magic: I swear, this frosting is foolproof—just melt butter, mix in chocolate chips, then fold in powdered sugar and cocoa. No measuring cups, no guesswork, just pure, velvety chocolate that tastes like it took hours (but didn’t).
- Decadent Without Guilt: That perfect balance of melted butter and semi-sweet chocolate chips? It’s rich enough to feel special, but the vanilla extract keeps it from being overpowering. Honestly, I’ve made it for cupcakes, brownies, and even swirled into pancakes—every time, it’s the star.
- Party-Ready in Minutes: Between us, this is my go-to for last-minute desserts. Double the batch, store it in the fridge, and you’ve got frosting for birthdays, potlucks, or just because. The cocoa powder keeps it stable, so it doesn’t melt or separate—just smooth, creamy perfection.
- Budget-Friendly Luxury: Unsalted butter and chocolate chips might sound fancy, but they stretch far. A single batch covers a 9x13 pan of brownies or 12 cupcakes, and leftovers? They last a week in the fridge. My secret weapon for looking like a baking pro without breaking the bank.
Step-by-step instructions for velvety chocolate frosting
Here's how to craft a luxurious chocolate frosting that stays perfectly smooth and never separates.
Melt Butter and Chocolate Together
In a medium heatproof bowl set over a pot of simmering water, combine the 1 cup unsalted butter (cut into cubes) and 1.5 cups semi-sweet chocolate chips. Keep the heat at a gentle simmer—you want the water to maintain a temperature around 160°F to 170°F. Stir occasionally with a silicone spatula until the butter melts completely and the chocolate transforms into a glossy, liquid mixture.
Here's the thing—you'll know it's ready when the chocolate fully dissolves and the mixture looks silky smooth. Remove the bowl from heat immediately to prevent overheating, which can cause the chocolate to seize. Let it cool slightly for 5 minutes while you prepare the remaining ingredients. This step is crucial for achieving that signature creamy texture without any graininess.
Whisk in Powdered Sugar and Cocoa Powder
Add the 3 cups powdered sugar and 0.5 cup cocoa powder to the melted chocolate mixture. Using an electric mixer on medium speed, beat everything together for 2-3 minutes until completely smooth. You want to ensure there are no lumps—this is where your patience pays off for that velvety finish.
If you notice any stubborn lumps, stop the mixer and use a spatula to gently fold them in by hand. The powdered sugar should dissolve completely, creating a thick, glossy paste. This is the foundation of your frosting, so take your time here. Real talk: skipping this thorough mixing step is what causes that dreaded "sandy" texture in homemade frostings.
Incorporate Vanilla and Heavy Cream
With the mixer still running on medium speed, gradually add the 1 tbsp pure vanilla extract and 0.25 cup heavy cream. Mix for another 1-2 minutes until the frosting reaches a smooth, spreadable consistency. The heavy cream adds that luxurious richness while keeping the frosting stable—no more worrying about separation.
Here's a pro tip: if the frosting starts looking too thick, add 1 tablespoon of milk at a time until it reaches your desired consistency. But trust me, this recipe should give you perfect spreadability right out of the bowl. The cold heavy cream helps stabilize the mixture, preventing that curdled look you sometimes see in homemade frostings.
Chill and Test for Perfect Consistency
Transfer the frosting to a clean bowl and cover it with plastic wrap, pressing the wrap directly onto the surface to prevent a skin from forming. Refrigerate for 30-60 minutes to let it firm up slightly. This chilling step is essential—it allows the flavors to meld together and gives you that ideal piping consistency.
After chilling, give it one final beat with the mixer on low speed for 30 seconds to restore smoothness. Test the consistency by piping a small amount onto a plate—it should hold its shape but still be easy to spread. If it's too thick, add 1 teaspoon of milk at a time until you reach that perfect balance between firmness and spreadability. You're aiming for that professional-quality frosting that's neither too stiff nor too runny.
Pro Tips For Making Betty Crocker Rich And Creamy Chocolate Frosting
- Melt Butter Slowly: If you dump cold butter straight into the pot with chocolate chips, you’ll end up with lumps that never fully smooth out. Warm the butter in a microwave-safe bowl for 30 seconds first—just until it’s soft but not liquid—then pour it into the chocolate. This lets the heat distribute evenly without shocking the chocolate.
- Sift the Cocoa: Unsifted cocoa powder is dense and clumpy, and this frosting relies on it dissolving smoothly. Use a fine-mesh sieve or whisk it vigorously in the bowl before adding other ingredients. Skipping this step gives you a gritty texture that ruins the creamy finish.
- Whip the Butter: The recipe calls for softened butter, but "softened" doesn’t mean melted—it means it should dent when pressed but hold its shape. If it’s too warm, the frosting will turn greasy; if too cold, it’ll be grainy. Test it on your wrist: it should feel cool but pliable, like a good hand cream.
- Add Vanilla Last: Vanilla extract is volatile and can burn off if heated. Stir it in only after the frosting has cooled slightly—about 2 minutes off the heat. This keeps the flavor bright and prevents that sad, cooked-alcohol taste that kills the richness.
Make-ahead tips for this betty crocker rich and creamy chocolate frosting
Prep Ahead
Make this frosting up to 3 days in advance—it actually tastes better after resting as the flavors deepen. Store it in an airtight container (like a Rubbermaid Brilliance or OXO Good Grips) in the fridge.
For longer storage, freeze dollops on parchment paper in a ziplock bag—they thaw in 10 minutes at room temperature. Honestly, this is my go-to for last-minute desserts because it saves time on baking day. 💫
Thawing Tricks
If you froze your frosting, place the container in lukewarm water for 5-7 minutes to soften it gently. Never microwave—it can cause separation. For dollops, let them sit at room temperature for 15 minutes before using.
Pro tip: If the frosting looks too thick after thawing, add 1 teaspoon of milk at a time until it reaches that perfect spreadable-but-pipeable consistency.
Make-Ahead for Cakes
Assemble your cake layers and refrigerate them unfrosted for up to 2 days. When ready to frost, let the cake sit at room temperature for 20 minutes so the frosting spreads evenly.
This prevents soggy layers and makes decorating a breeze. I like to pipe a thin \"crumb coat\" first, chill for 15 minutes, then add the final layer for that bakery-style finish.
Batch Prep for Holidays
Double or triple the recipe and store in 1-cup portions in small containers. Label each with the date—this frosting keeps for 5 days in the fridge or 3 months in the freezer.
During holidays, I prep 4 batches so I’m never scrambling. Just thaw what you need and you’re ready to decorate cupcakes, cookies, or cakes in minutes. 🎄
Dietary Adaptations
For a dairy-free version, replace the butter with 1 cup coconut oil (solid) and use dairy-free heavy cream. The texture will be slightly firmer but still creamy. For lower sugar, reduce powdered sugar to 2.5 cups and add 0.25 cup maple syrup.
Both versions keep just as well as the original—just store them in glass containers to avoid absorbing fridge odors.
Freezing for Piping
If you plan to pipe (like for cupcakes), freeze the frosting in a piping bag without the tip. When ready to use, thaw in the fridge for 2 hours, then pipe as usual.
This keeps the frosting stable and prevents collapse. I’ve used this trick for Christmas trees on cupcakes—it’s a game-changer for decorating ahead of time. ✨
Nutrition facts
Frequently asked questions
Why does my chocolate frosting sometimes separate or get grainy?
This usually happens when butter overheats or chocolate isn't fully melted before mixing. Always use a double boiler for melting, keeping the temperature between 160°F and 170°F, and let the mixture cool slightly before adding powdered sugar. The key is gradual incorporation of dry ingredients while mixing on medium speed for 2-3 minutes to fully dissolve any lumps.
Can I make this frosting without an electric mixer?
Yes, but it requires more elbow grease! Use a sturdy whisk and mix vigorously in a large bowl for 5-7 minutes after adding powdered sugar and cocoa. For best results, melt the butter and chocolate together first, then gradually whisk in dry ingredients while folding with a spatula. The heavy cream helps stabilize the texture even without a mixer.
How do I know when my frosting is at the right consistency?
Test it with the "spoon test": dip a spoon in and lift it—perfect frosting should hold a peak but slowly melt. For piping, it should be thick enough to stay in place but spreadable for cakes. If too thick, add 1 teaspoon of milk at a time. If too thin, chill for 15-20 minutes and re-whisk briefly.
What's the best way to store leftover frosting?
Transfer to an airtight container and refrigerate for up to 5 days. For longer storage, freeze in 1-tablespoon dollops on parchment paper. Thaw at room temperature for 15 minutes before using. Never microwave—it causes separation. For piping, freeze in a piping bag without the tip and thaw in the fridge for 2 hours before decorating.
Can I use this frosting for cookies or just cakes?
This frosting works beautifully for both! For cookies, let it soften slightly at room temperature before spreading. For cakes, chill the frosting for 30 minutes before piping to prevent melting. The rich texture pairs perfectly with chocolate chip cookies, brownies, or even as a filling for cake layers.