
Desserts
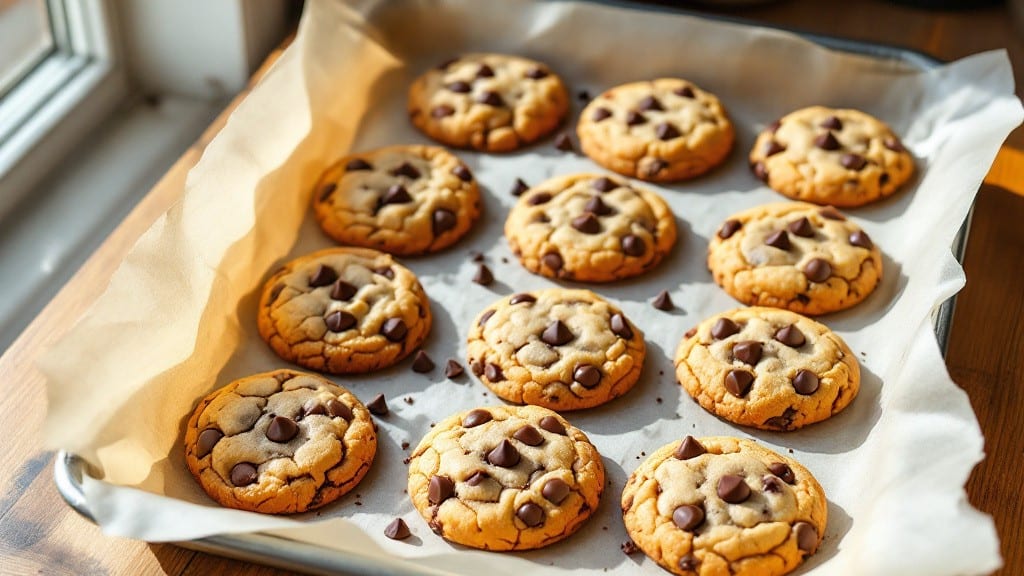
The Toll House milk chocolate chip cookie recipe delivers that perfect balance of crispy edges and chewy centers, with just the right amount of warm vanilla depth. 💛 I remember my dad letting me flip pancakes at six, but I never mastered chocolate chips—until now.
This recipe is my refined version of the classic, using high-quality chocolate and precise measurements to ensure every batch turns out just right.
What makes these cookies truly special is the combination of brown and white sugar, which creates a caramelized flavor while maintaining that signature cookie texture. The secret to achieving perfectly browned edges without burning lies in baking them at 350°F for 9–11 minutes, depending on your oven.
I’ve tested this recipe countless times to guarantee consistent results every time.
Once out of the oven, the edges will be golden and crispy, while the centers remain tender and gooey—just like you remember from childhood. The aroma of warm vanilla and melted chocolate fills the kitchen, making it impossible to resist grabbing one (or five) straight from the pan.
Let them cool slightly before serving, but honestly, who can wait?
For added depth, consider mixing in a pinch of sea salt or chopped nuts, or even swapping half the chocolate chips for white chocolate. This recipe is versatile enough to adapt while keeping the classic Toll House magic intact. Let’s get baking!
Ingredients for toll house milk chocolate chip cookie
High-quality chocolate, warm vanilla, and precise measurements—this is your cookie game-changer.
| Ingredient | Amount | Notes |
|---|---|---|
| Unsalted Butter 🧈 | 1 cup | Softened to room temperature |
| Granulated White Sugar 🍚 | ¾ cup | For tender cookie centers |
| Packed Brown Sugar 🍚 | ¾ cup | Light or dark variety |
| Large Eggs 🥚 | 2 whole | Room temperature preferred |
| Pure Vanilla Extract 🌿 | 2 tsp | High-quality, not imitation |
| All-Purpose Flour 🌾 | 2 ½ cups | Sifted for light texture |
| Baking Soda 🧂 | 1 tsp | Freshly measured |
| Sea Salt 🧂 | ½ tsp | Fine grain preferred |
| Milk Chocolate Chips 🍫 | 2 cups | High-quality chocolate (Ghirardelli recommended) |
| Semisweet Chocolate Chips 🍫 | 1 cup | Optional for extra richness |
The butter and sugars are non-negotiable here. Ghirardelli chocolate chips or Guittard are worth the splurge—they melt beautifully and keep their shape. For butter, Land O’Lakes unsalted is my go-to, but any good brand works. Brown sugar should be packed firmly into the cup—no shaking it down. The vanilla? Pure extract, not imitation—it makes a difference. I always grab mine at Williams Sonoma or the bulk section at Whole Foods if I’m feeling fancy. Flour? King Arthur or Gold Medal are my trusty brands—they bake up consistently.
No milk chocolate chips? White chocolate chips work in a pinch, but they’ll change the flavor profile. Short on semisweet? Dark chocolate chips at half the amount add depth. The baking soda is critical—don’t swap it for baking powder. Need a gluten-free version? King Arthur gluten-free flour blend works well, but expect slightly denser cookies. The eggs should be room temperature—cold eggs make for tough cookies. And trust me, measure your flour by weight if you can—it’s more accurate than volume.
Store dough in an airtight container for up to 3 days—it actually gets better overnight. Baked cookies keep for 5 days in a sealed tin, but honestly, they disappear faster than that. Freeze baked cookies for 3 months—just wrap them tightly in plastic. Pro tip: Underbake by 1 minute if you want gooier centers. And if you’re making a big batch, double the recipe—they’re worth it.
Why You'll Love This Recipe
- No-Fuss Mixing: I swear by this dough—just creaming butter and sugars until light, then folding in eggs and vanilla. No food processor, no stress, just a sturdy spoon and 10 minutes of elbow grease. That’s it. The texture comes out just right: chewy but not dense, with a tender crumb.
- Rich Chocolate Magic: The moment those milk chocolate chips hit the oven, the kitchen smells like nostalgia. The butter and brown sugar combo gives it that deep caramel sweetness, while the vanilla ties it all together. Honestly, the first bite makes me forget I’m even baking—it’s that good.
- Party in a Jar: Between us, these are my go-to for last-minute gatherings. Double the batch, freeze half, and boom—you’ve got a crowd-pleaser that needs zero effort to reheat. Kids grab them straight from the jar, and adults pretend they’re not sneaking seconds. (We all know the truth.)
- Budget Baking Wins: Butter and sugar are pantry staples, and this recipe stretches them perfectly. A single batch feeds four, and leftovers? They last days in an airtight container. I’ll be real: I’ve made this on a grocery-store budget, and it still tastes like a bakery’s secret.
Step-by-step instructions for Toll House milk chocolate chip cookies
Here's the foolproof method for cookies with rich vanilla flavor and edges that stay perfectly browned.
🍳 Step 1: Cream the Butter and Sugars to Fluffy Perfection
In a stand mixer fitted with the paddle attachment, beat the 1 cup unsalted butter on medium speed until smooth. Gradually add the 0.75 cup granulated white sugar and 0.75 cup packed brown sugar, mixing continuously for 3-4 minutes until the mixture is light and fluffy. You'll notice it nearly doubles in volume and turns pale—this is what creates those beautiful crackly tops.
Here's the thing—I always let the butter sit at room temperature for about 30 minutes before starting. Cold butter won't cream properly, and you'll end up with dense cookies instead of the tender, chewy texture we're after. The sugars should dissolve completely, leaving no grainy texture behind.
👨🍳 Step 2: Add Eggs and Vanilla for Rich Flavor
Add the 2 whole large eggs, one at a time, mixing on low speed for 30 seconds after each addition until fully incorporated. The mixture might look slightly curdled, but don't worry—it'll smooth out when we add the dry ingredients. Stir in the 2 teaspoons pure vanilla extract and mix for another 10 seconds until fully combined.
I've found that using room-temperature eggs makes a noticeable difference. They blend more smoothly and help create that perfect cookie texture. If your eggs are straight from the fridge, let them sit in warm water for 5 minutes before using. The vanilla extract should be high-quality—imitation vanilla just won't give you that warm, authentic depth of flavor.
👨🍳 Step 3: Combine Dry Ingredients for Light Texture
In a separate bowl, whisk together the 2.5 cups all-purpose flour, 1 teaspoon baking soda, and 0.5 teaspoon sea salt. Sift the flour mixture directly into the wet ingredients, mixing on low speed for 30-45 seconds just until combined. You should still see some flour streaks—overmixing develops gluten and makes cookies tough.
This is where the baking soda comes into play—it helps create that classic cookie rise. Don't skip sifting the flour; it aerates the mixture and prevents dense cookies. Once combined, remove the bowl from the mixer and gently fold in the 2 cups milk chocolate chips and 1 cup semisweet chocolate chips using a silicone spatula. Make sure they're evenly distributed throughout the dough.
⏰ Step 4: Chill the Dough for Better Shape and Flavor
Cover the bowl with plastic wrap and refrigerate for at least 30 minutes (I prefer 1 hour). Chilling the dough is absolutely critical—it prevents excessive spreading in the oven and allows the flour to fully hydrate. The butter will firm up slightly, which helps the cookies hold their shape and develop that perfect crackly crust.
Real talk: Skipping this step leads to flat, greasy cookies. The longer you chill (up to 24 hours), the better the flavor development. If you're in a hurry, at least 30 minutes makes a noticeable difference. Just don't skip it completely—your cookies will thank you!
🔥 Step 5: Bake to Golden Brown Perfection
Preheat your oven to 350°F and line two baking sheets with parchment paper. Using a cookie scoop or tablespoon, drop the chilled dough onto the prepared sheets, spacing them 3 inches apart. They won't spread much thanks to the chilling, but you still want room for even baking.
Bake for 11-13 minutes until the edges are golden brown but the centers still look slightly underdone. The cookies will continue cooking on the hot pan after you remove them. Let them cool on the baking sheet for 5 minutes before transferring to a wire rack. This resting period helps set the texture and prevents them from becoming too soft.
Pro Tips For Making Toll House Milk Chocolate Chip Cookie
- Cream Butter Slowly: Dump cold butter cubes into the sugar mix and let the food processor or mixer do the work—no need to rush. I used to melt it first, and the dough always ended up greasy instead of properly emulsified. Let the machine run until the butter’s fully incorporated and the mixture looks like wet sand.
- Pack That Brown Sugar: Use a spoon to press the brown sugar into the measuring cup until it’s packed tight—no fluffy gaps. I learned this the hard way when my cookies turned out too sweet and cakey. The recipe counts on that dense packing for the right balance of chew and flavor.
- Underbake Slightly: Pull cookies out when edges are golden but centers still look soft—about 30 seconds before they look "done." They’ll firm up as they cool, and overbaking turns them dry. I now set a timer for 10-12 minutes (depending on oven) and resist peeking.
- Chill Dough Twice: Divide the dough into balls, refrigerate for 30 minutes, then freeze on a tray for 15 minutes before baking. This prevents spreading and ensures even baking. I was skeptical until I tried it—now my cookies bake uniformly, and the edges stay crisp.
Pro cooking tips for this recipe
Room Temp Ingredients
Let your butter and eggs sit at room temperature for at least 30 minutes before mixing. Cold ingredients create dense cookies—the butter should be soft enough to press gently with your finger but not melted.
I always test this by pressing a thumb into the butter; if it leaves a slight indent, it's ready. Room-temperature eggs blend smoothly and help create that perfect chewy center. 🧈
Mixing Precision
Cream the butter and sugars on medium speed for 3-4 minutes until the mixture is pale and fluffy—this lightens the texture for those classic crackly tops. When adding eggs, mix on low speed for just 30 seconds after each addition to avoid overmixing.
The dough should be smooth but still hold its shape when dropped. I use a KitchenAid stand mixer with the paddle attachment for consistent results every time. 💫
Chill for Success
Never skip chilling the dough! Refrigerate for at least 30 minutes (I prefer 1 hour) to prevent excessive spreading and improve flavor development. The butter firms up slightly, helping cookies hold their shape and develop that perfect crackly crust.
Pro tip: If you're short on time, chill for 20 minutes in the freezer—just don't overdo it. The dough should be firm but still pliable when you scoop. ❄️
Baking Time Mastery
Bake at 350°F for 11-13 minutes until edges are golden brown but centers still look slightly underdone. The cookies will continue cooking on the hot pan after you remove them.
Let them cool on the baking sheet for 5 minutes before transferring to a wire rack—this resting period helps set the texture. I use a thermometer to check internal temperature at 160°F for perfect doneness. 🔥
Chocolate Chip Tips
Use high-quality chocolate chips like Ghirardelli or Guittard—they melt beautifully and keep their shape. For extra richness, fold in 1 cup semisweet chocolate chips along with the milk chocolate.
If you're feeling adventurous, swap half the milk chocolate for white chocolate chips or add chopped nuts like walnuts or pecans. Just be sure to distribute them evenly throughout the dough. 🍫
Oven Calibration
Every oven is different—if your cookies brown too quickly, reduce the temperature to 325°F and check after 10 minutes. If they spread too much, chill the dough longer or use a cookie scoop for consistent portions.
I always rotate baking sheets halfway through baking for even heat distribution. For extra crispy edges, place cookies on the top rack of the oven. 🌡️
Nutrition facts
Frequently asked questions
Why do your cookies need both white and brown sugar?
The combination creates the perfect balance of sweetness and caramelized depth. White sugar keeps the centers tender while brown sugar adds moisture and that classic cookie flavor. The ratio in this recipe (equal parts) ensures just the right amount of chewiness and crisp edges.
Can I make these cookies without a mixer?
Use a sturdy wooden spoon or silicone spatula to cream the butter and sugars by hand for 5-7 minutes until light and fluffy. For the eggs, mix gently by hand until just combined—overmixing develops gluten and makes cookies tough. The texture will be slightly less aerated but still delicious.
How do I store leftover cookies?
Store in an airtight container at room temperature for 5 days or freeze for 3 months. For best freshness, place parchment paper between layers to prevent sticking. Reheat in a 300°F oven for 3-5 minutes to restore that warm, gooey center.
My cookies spread too much—what went wrong?
This usually happens when dough isn't chilled long enough or butter is too soft. Always refrigerate dough for at least 30 minutes (1 hour is better). For extra insurance, chill the dough balls for 15 minutes before baking. Using a cookie scoop also helps maintain consistent size.
Can I substitute butter with oil?
Not recommended—oil lacks the fat content needed for proper texture. If you must, use 1/2 cup melted coconut oil plus 1/2 cup butter (reduced by 1 tbsp), but expect slightly denser cookies. The butter's flavor and fat content are key to that classic cookie experience.