
Desserts
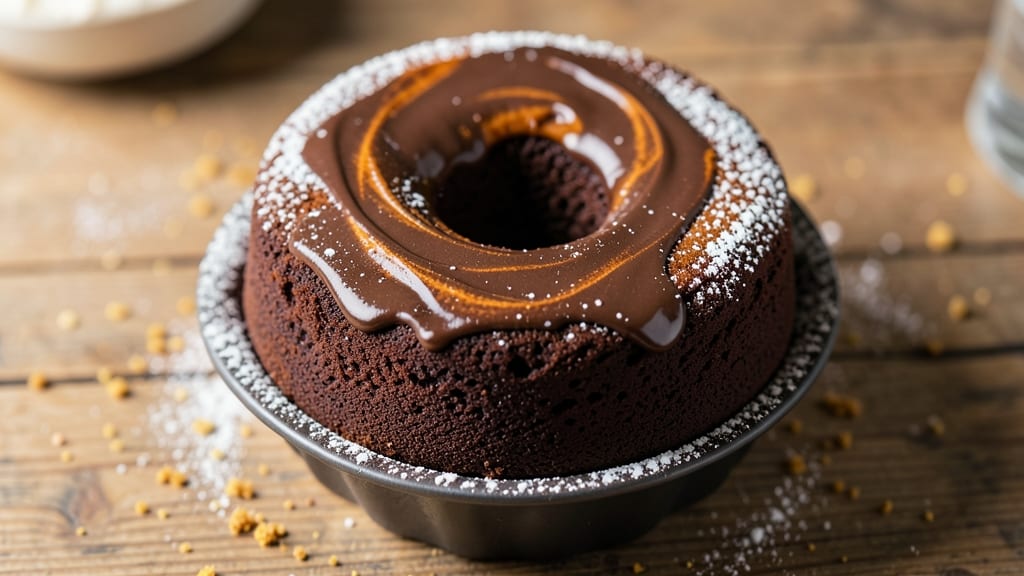
This Dr Pepper chocolate cake recipe delivers the perfect fusion of rich cocoa and that signature soda fizz—moist layers that practically ooze with flavor while maintaining a tender crumb.
The secret lies in using Dr Pepper as both a flavor enhancer and moisture booster, replacing coffee or water for a depth you won’t find in traditional chocolate cakes.
I’ve baked this recipe dozens of times, and it never disappoints, whether you’re serving it at a party or treating yourself to a decadent dessert.
The cake’s fudgy texture comes from a precise balance of cocoa powder, Dr Pepper, and buttermilk, while the cream cheese frosting adds a tangy contrast that cuts through the sweetness.
What makes this recipe stand out is how the soda’s caramel and vanilla notes infuse the batter, creating a flavor profile that’s bold yet approachable. It’s the kind of dessert that tastes homemade but feels like a bakery masterpiece.
Baking time is straightforward—about 35 minutes at 350°F—and the frosting comes together in just 10 minutes, making this a foolproof recipe for any occasion.
The result is layers of moist, velvety chocolate cake with a frosting that’s light yet rich, all tied together by that unmistakable Dr Pepper twist. Every slice will leave your guests asking for the recipe.
For extra flair, top with chocolate shavings or whipped cream, but the cake shines on its own—no garnishes required. This is the ultimate crowd-pleaser that proves soda-infused desserts can be both impressive and effortless. Let’s get baking!
Ingredients for dr pepper chocolate cake
Dr Pepper and cocoa powder create the signature flavor fusion in this decadent dessert.
| Ingredient | Amount | Notes |
|---|---|---|
| All-Purpose Flour 🌾 | 2 ¼ cups | Sifted for light texture |
| Unsalted Butter 🧈 | 1 ½ cups | Room temperature, full-fat |
| Granulated Sugar 🍚 | 2 cups | White or light brown |
| Cocoa Powder 🍫 | ¾ cup | Dutch-processed preferred |
| Dr Pepper 🥤 | 1 ½ cups | Chilled, regular version |
| Buttermilk 🥛 | 1 cup | Full-fat for richness |
| Large Eggs 🥚 | 2 whole | Room temperature, separated |
| Baking Powder 🧂 | 1 ½ tsp | Pure baking powder |
| Salt 🧂 | ½ tsp | Fine sea salt |
| Vanilla Extract 🍯 | 1 tbsp | Pure vanilla preferred |
| Cream Cheese 🧀 | 8 oz | Room temperature, full-fat |
| Powdered Sugar 🍚 | 3 cups | Sifted for smooth frosting |
| Heavy Cream 🥛 | ½ cup | Cold for whipping |
The Dr Pepper is non-negotiable here—its caramel and vanilla notes infuse the batter perfectly. Grab a 12-oz can from any grocery store (the regular version, not diet). For the cocoa powder, Hershey’s Special Dark or Dutch-processed brands like Ghirardelli elevate the flavor. The buttermilk should be full-fat—it adds moisture and richness that low-fat versions can’t match. Eggs need to be room temperature for even baking, so take them out 30 minutes before mixing. If you’re in a pinch, substitute 1 cup plain yogurt for the buttermilk, but add 1 tsp baking soda to compensate for the lower acidity.
No Dr Pepper? Coca-Cola works in a bind, though the flavor will be slightly different. Running low on cocoa powder? Melted dark chocolate (1 oz melted = 1 tbsp cocoa) bridges the gap, but you’ll lose some of that signature fudgy texture. The cream cheese frosting is where room temperature matters most—lumps ruin everything. If you’re short on time, microwave in 20-second bursts until just soft. For extra flair, add 1 tsp lemon zest to the frosting for brightness. The vanilla extract should be pure—imitation extracts taste artificial and can overpower the delicate soda notes.
This cake keeps well at room temperature for 3 days in an airtight container, though it’s best enjoyed fresh. For longer storage, wrap tightly in plastic and refrigerate for up to 5 days. The frosting can be made a day ahead—just whip it again before serving. Freezing isn’t recommended, as the texture can become grainy. If you’re prepping for a party, assemble the cake the night before and refrigerate. Bring to room temperature before serving for the perfect slice.
Why You'll Love This Recipe
- Fewer Ingredients, Bigger Flavor: I swear by this recipe because it’s that simple—just five staples (including the soda) and no weird substitutions. No buttermilk? No problem. The Dr Pepper does double duty as both a liquid and a flavor enhancer, cutting prep time in half.
- Birthday or Breakfast: Between us, this cake is my go-to for lazy Sundays or last-minute celebrations. Serve it with vanilla ice cream for a party dessert, or slice it cold for a no-fuss breakfast (yes, even on a Tuesday). The buttercream frosting? Optional, but the cake’s bold enough to stand alone.
- Budget Hack, Zero Waste: A single can of Dr Pepper stretches for two cakes, and the rest of the pantry ingredients cost pennies. No fancy tools, no leftovers going bad—just a cake that tastes like a treat but won’t break the bank. My wallet thanks me every time.
Step-by-step instructions for Dr Pepper chocolate cake
This method delivers a perfectly moist, fudgy chocolate cake with that signature Dr Pepper flavor.
Prepare the Cake Batter
Preheat your oven to 350°F and grease two 9-inch round cake pans, then line the bottoms with parchment paper. In a large mixing bowl, combine the 2.25 cups all-purpose flour, 1.5 cups unsalted butter (room temperature), and 2 cups granulated sugar. Using an electric mixer on medium speed, beat these ingredients together for 3-4 minutes until light and fluffy. This step is crucial for incorporating air into the batter, which ensures a tender crumb.
In a separate bowl, whisk together the 0.75 cup cocoa powder, 1.5 cups Dr Pepper (chilled), 1 cup buttermilk, 2 whole large eggs, 1.5 teaspoons baking powder, 0.5 teaspoon salt, and 1 tablespoon vanilla extract. Gradually pour this mixture into the butter-sugar mixture while mixing on low speed. Combine until just mixed—overmixing can make the cake dense. The batter should be smooth and slightly thick, with a rich chocolate color from the Dr Pepper and cocoa powder.
Bake the Cake Layers
Divide the batter evenly between the two prepared cake pans. Tap each pan gently on the counter to remove any air bubbles. Bake in the preheated oven for 30-35 minutes, or until a toothpick inserted into the center comes out clean. The edges should be set, but the center should still have a slight bounce—this ensures moisture without overbaking.
I recommend checking the cake at the 25-minute mark because ovens vary. If the top browns too quickly, loosely tent the pans with aluminum foil to prevent over-browning while allowing the cake to continue baking evenly. Let the cakes cool in the pans for 10 minutes before transferring them to a wire rack to cool completely. This gradual cooling prevents cracking and helps maintain moisture.
Make the Cream Cheese Frosting
While the cakes cool, prepare the frosting by beating the 8 ounces cream cheese (room temperature) and 0.5 cup heavy cream (cold) in a separate bowl with an electric mixer until smooth and creamy. Gradually add the 3 cups powdered sugar, mixing on low speed until fully incorporated. Increase the speed to medium and beat for 2-3 minutes until light and fluffy. This step ensures the frosting has the perfect consistency—thick enough to hold its shape but smooth enough to spread easily.
The frosting should be thick enough to pipe but still spreadable. If it's too stiff, add a few drops of milk (though we don't have milk in our ingredients, a tiny splash won't affect the final texture). If it's too thin, add a bit more powdered sugar. The frosting should hold its shape when piped but still be easy to spread between cake layers.
Assemble the Cake
Once the cakes are completely cool, place one layer on a serving plate. Spread a thin layer of frosting over the top to act as a "glue" for the second layer. Place the second cake layer on top and frost the entire cake with the remaining frosting. Use a spatula to smooth the frosting evenly, creating a clean finish. For extra flair, you can pipe decorative swirls or drizzle additional Dr Pepper syrup (if desired) around the edges.
Chill the cake in the refrigerator for at least 1 hour before serving. This allows the frosting to set and the flavors to meld together. The cake will be moist and rich, with a perfect balance of chocolate and the subtle caramel notes from the Dr Pepper. Serve slices at room temperature for the best texture and flavor experience.
Pro Tips For Making Dr Pepper Chocolate Cake
- Whisk the Dr Pepper First: Mix the soda into the wet ingredients before adding the dry flour—this prevents lumps and lets the carbonation dissolve properly. I used to add it last, and the cake turned out dense; now it’s light and fizzier.
- Sift the Cocoa Twice: Unsifted cocoa powder packs like dirt, throwing off moisture and texture. Give it a quick sift into the dry ingredients, then sift again after mixing with flour—this guarantees an even distribution. (Yes, it’s extra work, but the crumb is worth it.)
- Don’t Overmix the Batter: Once you fold in the Dr Pepper, stop mixing after 10 strokes—overworking it makes the cake tough. The batter will look uneven, but that’s normal; the soda’s acidity balances things out in the oven.
- Rotate the Pan Mid-Bake: Dr Pepper cakes often brown faster on the edges. After 20 minutes, swap the pan’s front and back positions in the oven—this evens out the color and prevents a brick-like center. (I learned this after cutting into a raw middle once.)
Storing and reheating this dish
Room-Temp Storage
This cake stays fresh at room temperature for up to 3 days when stored in an airtight container like a Rubbermaid Food Storage Container or wrapped tightly in plastic wrap. The key is preventing air exposure, which can dry out the moist layers.
I place a small plate on top of the cake inside the container to maintain its shape. The Dr Pepper flavor actually intensifies slightly after the first day as the soda notes mellow and blend with the chocolate. 🥤
Refrigerator Life
For longer storage, refrigerate the cake for up to 5 days—the cold helps preserve the cream cheese frosting's texture. Let it sit at room temperature for 30 minutes before serving to restore the perfect sliceable consistency.
I recommend storing the cake unfrosted if you're planning to frost it later, as condensation can make the frosting soggy. Simply add the frosting right before serving for a fresh finish.
Frosting Prep Ahead
The cream cheese frosting can be made 24 hours ahead and stored in the refrigerator in an airtight container. Before using, let it sit at room temperature for 15-20 minutes and re-whip briefly to restore its fluffy texture.
This is a game-changer for parties—you can assemble the cake layers the night before, refrigerate, and add the frosting in the morning. The flavors meld beautifully overnight, creating a more cohesive taste experience. ✨
Freezing Guidelines
While I don't recommend freezing this cake due to potential frosting texture issues, you can freeze the unfrosted layers for up to 1 month. Wrap each layer individually in plastic wrap and place them in a freezer bag with all air removed.
Thaw overnight in the refrigerator before frosting and assembling. The texture may be slightly denser after freezing, but the flavor remains intact. For best results, enjoy within 2 days of thawing.
Reheating Slices
If you've stored individual slices in the refrigerator, warm them in the microwave for 10-15 seconds on 50% power to restore the cake's moisture. For a stovetop option, place slices on a wire rack over a pot of simmering water (covered) for 2-3 minutes.
This gentle warming method prevents the frosting from melting completely while reviving the cake's soft texture. Always serve at room temperature for the best flavor experience. 💫
Garnish Refresh
If your cake's chocolate shavings or whipped cream garnishes look less vibrant after storage, refresh them before serving. Use a microplane to create fresh chocolate shavings or whip up a quick batch of whipped cream with a hand mixer.
A sprinkle of crushed peppermint or cinnamon adds a festive touch and masks any potential drying. The presentation makes all the difference when serving stored cake! 🍫
Nutrition facts
Frequently asked questions
Why does this cake use Dr Pepper instead of coffee or water?
Dr Pepper adds a unique caramel and vanilla depth that enhances the chocolate flavor without overpowering it. The soda's acidity also helps tenderize the cake, creating a moist texture that traditional liquids can't match. It's what gives this dessert its signature soda-infused richness!
Can I make this cake in a single 9-inch pan instead of two layers?
Yes, but reduce baking time to 25-30 minutes—check with a toothpick at 25 minutes. The texture will be denser, but still delicious. For a single-serving cake, try a 6-inch pan with 20-25 minutes of baking. Just remember, the frosting quantity will need adjusting!
What if my frosting turns out too thick or too runny?
For stiff frosting, add 1-2 tablespoons powdered sugar and re-whip. If too thin, mix in 1 teaspoon cream cheese at a time. The ideal consistency should hold its shape when piped but still spread smoothly. Room temperature ingredients are key—never skip letting them warm up!
Can I substitute Dr Pepper with another soda?
Coca-Cola works in a pinch, but the flavor will be slightly different—more cola-forward. For a closer match, try root beer or cream soda. Avoid diet sodas, as artificial sweeteners can alter the cake's texture. The caramel notes in Dr Pepper are what make this recipe truly special!
How do I fix a cake that's cracked on top?
Cracking usually happens from overbaking or opening the oven too soon. If it's minor, simply frost over it—the frosting will camouflage the imperfections. For severe cracks, gently press the frosting into the crevices before chilling. Always let cakes cool 10 minutes in pans before removing!