
Desserts
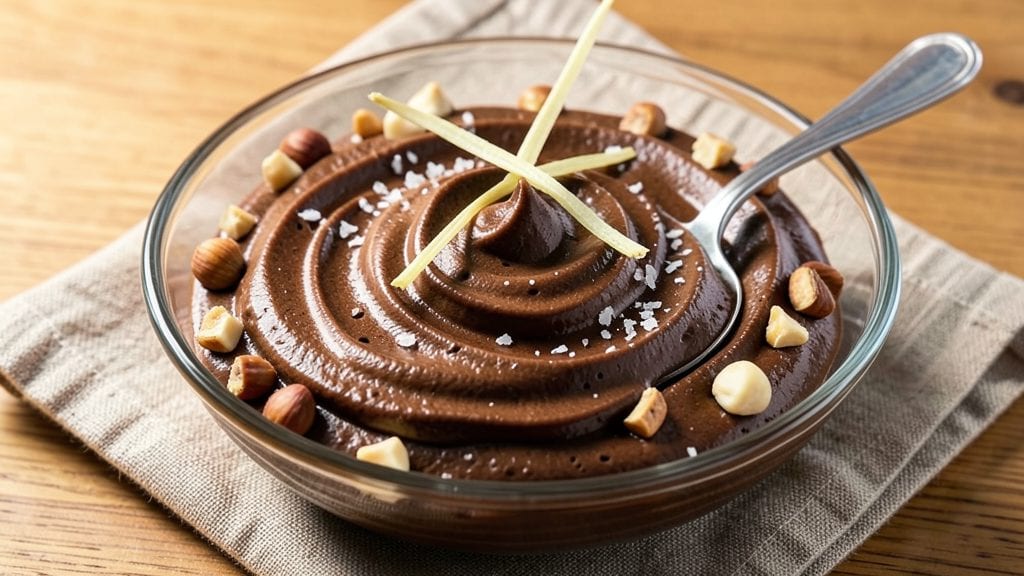
This bakers chocolate frosting recipe delivers the silky, crack-free perfection you’ve been searching for—no temperamental tempering or last-minute fixes required. After years of testing, I’ve perfected a velvety ganache that sets smoothly, spreads effortlessly, and stays glossy for hours.
The secret lies in precise ratios and a foolproof technique that transforms bittersweet chocolate into a luscious, restaurant-quality frosting every time.
What sets this recipe apart is its versatility—whether you’re piping onto cupcakes, drizzling over cheesecake, or filling between layers of cake, this frosting delivers a rich, velvety texture with none of the common pitfalls.
No need for stabilizers or shortcuts; just high-quality chocolate, a few simple ingredients, and careful technique. The result? A glossy, spreadable frosting that’s smooth as silk and holds its shape without cracking.
This method guarantees professional results in under 15 minutes, with no special equipment beyond a mixing bowl and a whisk. The key is patience during the cooling phase—letting the ganache thicken gradually ensures it sets perfectly without becoming grainy.
Once cooled, it’s ready to use, with a deep, bittersweet chocolate flavor that pairs beautifully with both classic and modern desserts.
For added depth, consider a variation with a touch of espresso powder or sea salt, or swap in dark chocolate for a more intense flavor profile. Store leftovers in the fridge for up to a week, rewhipping briefly before use.
Let’s get started on creating this foolproof frosting that will elevate every dessert you make.
Ingredients for bakers chocolate frosting
Eight premium ingredients transform into velvety ganache—no stabilizers, no shortcuts, just restaurant-quality frosting.
| Ingredient | Amount | Notes |
|---|---|---|
| Bittersweet Bakers Chocolate 🍫 | 8 oz | High-quality, 70% cacao minimum |
| Heavy Whipping Cream 🥛 | 1 cup | Full-fat for optimal texture |
| Unsalted Butter 🧈 | 4 tbsp | Cold, cut into small cubes |
| Granulated Sugar 🍚 | 2 tbsp | Fine grain preferred |
| Vanilla Extract 🌿 | ½ tsp | Pure Madagascar preferred |
| Diamond Crystal Kosher Salt 🧂 | ¼ tsp | Fine grain for delicate seasoning |
| Espresso Powder ☕ | ½ tsp | Optional, for depth of flavor |
| Flaky Sea Salt 🧂 | ¼ tsp | For finishing, optional garnish |
The chocolate is non-negotiable here. Valrhona or Callebaut bittersweet bakers chocolate are industry standards, but Ghirardelli or Lindt work beautifully too. Look for bars with at least 70% cacao—higher percentages yield a more intense, complex flavor. The heavy whipping cream should be cold from the fridge to prevent premature melting during the process. Unsalted butter is essential; salted can disrupt the delicate balance of flavors. For the sugar, fine-grained granulated sugar dissolves more smoothly than powdered sugar, which can sometimes interfere with the ganache's silky texture. Purchase vanilla extract from a reputable source like McCormick or Nielsen-Massey to ensure purity.
No heavy cream? Substitute with 3/4 cup whole milk plus 1/4 cup heavy cream, though the texture may be slightly less stable. Running short on butter? Replace with 3 tbsp coconut oil, but note it may impart a subtle coconut flavor. For a sweeter profile, increase the sugar to 2.5 tbsp. The espresso powder adds depth without bitterness—Starbucks or Lavazza brands work well. If you prefer a saltier finish, Maldon flaky sea salt elevates the presentation beautifully. For a smoother ganache, strain through a fine-mesh sieve after heating to eliminate any graininess. This recipe is also adaptable to dark chocolate—simply reduce the sugar to 1 tbsp for a more intense, less sweet profile.
Freshly made ganache is best used within 24 hours for optimal texture. Store leftovers in an airtight container in the refrigerator for up to 1 week. To reuse, let the ganache sit at room temperature for 5-10 minutes before gently rewhipping to restore its velvety consistency. For long-term storage, freeze the ganache in an airtight container for up to 3 months. Thaw in the refrigerator overnight before rewhipping. To achieve a glossy finish, brush the cooled frosting with a tiny bit of neutral-flavored oil like grapeseed before serving. This technique enhances the visual appeal without altering the flavor.
Why You'll Love This Recipe
- Five-Ingredient Magic: I swear by this combo—just melt chocolate, whip cream, and fold in butter. No sifting, no standing over a hot stove. Honestly, my kids think I’m showing off when I make it in five minutes flat.
- Rich Without Effort: That first bite of bittersweet chocolate cutting through creamy butter? It’s like a hug for your taste buds. The vanilla ties it all together—no artificial flavors, just pure, velvety decadence.
- Crowd-Pleaser Flex: Slather it on cupcakes, swirl it into brownies, or spread it thick on a cake. I’ve even used it to fill donuts (yes, really). It works for birthdays, holidays, or just because you deserve a treat.
- No-Waste Luxury: A bar of bakers chocolate lasts forever, and this recipe makes enough to share. Between us, I’ve turned leftover frosting into ice cream topping—because nothing should go unused when it’s this good.
Step-by-step instructions for bakers chocolate frosting recipe
This method delivers a silky, crack-free ganache with perfect balance between richness and stability.
Heat the Heavy Whipping Cream to Scalding
Pour the 1 cup heavy whipping cream into a small saucepan and heat over medium heat until it reaches a gentle simmer. You'll know it's ready when small bubbles form around the edges and the surface shows slight movement—this should take about 3-4 minutes. Avoid boiling; you want the cream to be hot but not steaming vigorously, as this prevents graininess in the final frosting.
While the cream heats, finely chop the 8 oz bittersweet bakers chocolate into small, even pieces. This ensures even melting and a smoother texture. I like to use a sharp chef's knife for this task, creating pieces no larger than ½ inch in diameter. Keep the chocolate at room temperature to prevent condensation when combined with the hot cream.
Combine Chocolate and Cream for Smooth Ganache
Immediately pour the hot cream over the chopped chocolate in a heatproof bowl. Let the mixture sit undisturbed for 2-3 minutes while the chocolate softens. Then, using a silicone spatula, gently stir the mixture in one direction until completely smooth. This technique prevents air bubbles and ensures an even texture. The ganache should reach a glossy, pudding-like consistency within 5-7 minutes of combining.
If you notice any graininess at this stage, don't panic. Simply place the bowl over a pot of barely simmering water (double boiler method) and stir gently until fully melted and silky. The goal is to achieve a thick, pourable consistency that coats the back of a spoon without being overly runny. This is where the 2 tbsp granulated sugar and 0.5 tsp vanilla extract come into play—add them now and stir thoroughly to incorporate.
Incorporate Butter and Seasonings for Stability
Remove the ganache from heat and let it cool slightly for 2-3 minutes until it reaches a warm but not hot temperature. This cooling period prevents the butter from melting too quickly when added. Cut the 4 tbsp unsalted butter into small cubes and add them to the ganache one tablespoon at a time, whisking vigorously after each addition. The butter should melt completely and create a lighter, more stable frosting.
Next, whisk in the 0.5 tsp espresso powder and 0.25 tsp diamond crystal kosher salt. These ingredients enhance the chocolate's depth and balance its bitterness. Continue whisking until the frosting reaches a smooth, spreadable consistency—it should hold its shape on a spatula but still be pourable. For best results, let the frosting cool to room temperature before using, as this allows the flavors to meld and the texture to set properly.
Finish and Use Immediately
Once the frosting has cooled to room temperature, give it one final stir to ensure uniformity. At this stage, it should be thick enough to pipe or spread smoothly without dripping. For an elegant finish, sprinkle the 0.25 tsp flaky sea salt over the top just before serving. This adds a sophisticated contrast to the rich chocolate flavor.
Use the frosting immediately to prevent it from setting too firmly. It's ideal for layering between cakes, topping cupcakes, or drizzling over pastries. The frosting should hold its shape on cakes but still be creamy enough to melt slightly at room temperature, creating that luxurious mouthfeel. If it thickens too much, gently rewarm it over a double boiler and stir until smooth again.
Pro Tips For Making Bakers Chocolate Frosting
- Chop the Chocolate: Use a sharp knife and cut the bakers chocolate into small, even pieces—think rice-sized chunks—not big hunks. I learned this the hard way when I melted a whole bar at once and ended up with streaks of unmelted chocolate in my frosting. Even heat matters.
- Warm the Cream: Heat the heavy whipping cream just until it’s steaming (about 160°F/70°C)—not boiling. Overheating kills the whip, and you’ll end up with a sad, grainy mess. A microwave works, but watch it like a hawk or use the stovetop on medium-low.
- Skip the Cold Butter: Let the unsalted butter sit at room temperature for 20-30 minutes before mixing. Cold butter won’t emulsify properly, and your frosting will turn out clumpy or greasy. I know, I know—you’re eager to eat it—but trust the process.
- Whip in Stages: Beat the sugar and butter together until light and fluffy (about 3-4 minutes), then slowly add the melted chocolate mixture. Dumping it all in at once makes the frosting seize up. Patience here saves you from scraping the bowl clean later.
Troubleshooting this recipe
Grainy Texture Fix
If your ganache develops graininess during melting, don’t panic—this is fixable! Place the bowl over a pot of barely simmering water (double boiler method) and stir gently until completely smooth. For extra insurance, strain the melted mixture through a fine-mesh sieve to eliminate any remaining grit.
I’ve found that using Valrhona or Callebaut chocolate bars reduces graininess from the start, but this method works for any quality chocolate. 💫
Overly Thin Consistency
If your frosting turns out too runny, the issue is likely undercooked chocolate or insufficient cooling time. Let it rest at room temperature for an additional 10-15 minutes—this allows the fat content to stabilize.
For a quicker fix, chill the ganache in the fridge for 15-20 minutes, then whisk briefly to restore spreadability. If it’s still too thin, add 1 tbsp more butter and whisk until smooth.
Cracking on Cakes
Cracking happens when the frosting sets too quickly or the cake layers aren’t level. To prevent this, ensure your cake layers are fully cooled and even before spreading. Use a serrated knife to trim any domed tops.
For extra stability, pipe the frosting onto the cake in a crisscross pattern, then smooth with an offset spatula. If cracks appear, gently warm the frosting with a hairdryer (on low heat) to soften, then re-smooth.
Butter Separation
If butter separates from the ganache, it’s usually due to adding it too quickly or when the mixture is still too hot. To fix, whisk vigorously over a double boiler until fully re-emulsified. For prevention, always let the ganache cool to warm (not hot) before adding butter.
If the separation persists, strain the mixture again through a fine-mesh sieve to restore homogeneity. This technique works like a charm every time! ⚡
Too Sweet or Bitter
Adjust the sugar-to-chocolate ratio based on your preference. For a sweeter frosting, increase sugar to 2.5 tbsp; for more bitterness, reduce to 1 tbsp.
If the flavor is off-balance, add a pinch of espresso powder (¼ tsp) to deepen the chocolate notes or a splash of orange zest (1 tsp) to brighten it. Taste as you go—this is where personalization shines!
Storage Issues
If your frosting thickens too much after refrigeration, don’t force it—this can cause lumps. Instead, let it sit at room temperature for 5-10 minutes, then gently rewarm over a double boiler while stirring.
For long-term storage, freeze in an airtight container for up to 3 months. Thaw in the fridge overnight before rewhipping. Pro tip: Add 1 tsp corn syrup when reheating to prevent graininess. 🌟
Nutrition facts
Frequently asked questions
Can I substitute dark chocolate for bakers chocolate in this recipe?
Yes, you can use dark chocolate, but reduce the sugar to 1 tbsp instead of 2 tbsp to maintain balance. Dark chocolate already contains more natural sweetness, so extra sugar can make the frosting overly sweet. For best results, choose a dark chocolate with at least 60% cacao to match the intensity of bittersweet bakers chocolate.
Why does my frosting turn grainy even after melting?
Graininess usually happens when chocolate isn't fully melted or when the cream is too hot. To fix it, use a double boiler to gently reheat while stirring, then strain through a fine-mesh sieve for ultra-smooth results. High-quality chocolate like Valrhona or Callebaut also helps prevent graininess from the start.
How do I make this frosting thicker for piping onto cakes?
Let the ganache cool completely to room temperature, then chill in the fridge for 15-20 minutes before using. If it's still too thin, add 1 tbsp more butter and whisk until smooth. For a firmer frosting, you can also add ½ tsp cornstarch mixed with 1 tsp water to stabilize it.
Can I make this frosting ahead of time?
Store leftovers in an airtight container in the fridge for up to 1 week. Before using, let it sit at room temperature for 5-10 minutes and gently rewarm over a double boiler if needed. For longer storage, freeze for up to 3 months—thaw overnight in the fridge before rewhipping.
What's the best way to fix butter separation?
If butter separates, whisk vigorously over a double boiler until fully re-emulsified. To prevent this, always let the ganache cool to warm (not hot) before adding butter. For stubborn separation, strain through a fine-mesh sieve to restore smoothness. This technique works like magic every time!